Oops! I Dyed It Again

Bubble, bubble, toil and trouble.

Dye this fringe, so I won’t whinge.

Red and black, can never go back.

Seems to be working, I don’t know.

Better than orange, that is so!

Time, time, ten minutes in.

Have a look and leave it spin.

Set the timer, twenty for sure.

How’s my rhyming, do you want more?!

Stirring, stirring, constant pot.

Working up a sweat, with this lot!

Seven minutes more, this really is a bore.

Typing with one finger, while I have to linger.

Oops, there goes the bell!

Now only time will tell.

Rinse it with a …..sigh, and wait for it to dry.

Okay this IS looking pretty good at the moment. The hands….not so much, should’ve worn gloves while rinsing. Coupl’a days! She’ll be Jake!


Mission, semi accomplished! Might I add, this is round 3! Did the second batch this morning, still wasn’t happy, now I just might be! 🙂

Have a good one!

Kat xo


To Dye For

Yes, nice little play on words there. 🙂

I have started the recreation process of the 'Eva' outfit from Hell on Wheels for my friend Belle Vaquera.


The underskirt is complete, with built in petticoat.


The overskirt is now taking shape with the gold skirt finished, it is waiting on the teal and burgundy chiffon overlay.


Fabric acquired. Fringing acquired………supposed to be cranberry. 😦


Not to worry, after a bit of sort after advice let's just dye it!

So yesterday in between spurts of B-Western shirts and lunch I decided to give it a crack.

Cut 1 small sample, put on pot of water/dye solution, boil said piece for 15mins. Ahh success! It is a deeper colour and more in tune with the chiffon and bodice fabric. Yippee!


……..many hours later, I return to switch lights off in the study and see that my sample piece – now dry – is no different to how it was that morning!!


Sigh, well, I know it needs to be in the dye longer and now I know it will be the whole lot of dye, not much water, salt or vinegar to set and leave it for 30mins plus. That can be this afternoons task.

Have a colourful day!

Kat xo

P.S. In my quest to have things as close as possible to the real deal, I have finally come up with a way to do the gold embroidery that I'll be happy with and whilst doing yoga this morning have worked out the edge trim. As Mum would say 'a blind man on a galloping horse wouldn't see it' if it wasn't there……but I would 😉 xo


What A Tangled Web We Weave

I've been doing these Tom Mix inspired jackets for Jack and I for some time now.

We first saw the shell jacket in one of our very first visits to the Oklahoma History Centre which was quite opportune at the time as they had a whole section on famous Oklahomans.

Right in the door way was a Tom Mix exhibit with his shell jacket (c.1935 from what I can tell from the plaque) a saddle and pictures.

Having wandered through the rest of the exhibit hall it really struck me that this would make a pretty neat costume and I should have a crack at it!


So a few photos later it's been sitting on the back burner for about 3 years, fabric purchased probably about 2 years. A good test of the soutache skills led to some eye rolling, tantrum throwing days but eventually a result that I was reasonably happy with!

A split/riding skirt for me and a new pair of duds for Jack – in coordinating fabric – and then it was procrastinate, research and procrastinate some more over the shoulder boards.

More super eye rolling and research eventuated in finding xmarksthescot.com and their question/how-to regarding the making of shoulder boards. Yes thank you! A decent blog/internet response regarding 'how to make shoulder boards'!

So step 1 – skip the part about some program that helps you develop some template on how to make a shoulder board.

Looks about an inch apart………that will do she says! Let's do this!


Step 2 – out to the shed. Acquire a scrap piece of timber from Jack, yep that'll do, and look at pic again from Internet conversation. We can do this!


Step 3 – draw up (a presumed) 1″ grid on piece of timber as per picture. Got it! Sorted!


Step 4 – nails, find nails, yep, hot enough. Hammer nails in to create a 'loom' type piece for making shoulder board weave on.


Step 5 – acquire internet picture again. Yep, should be able to do this……..get so far and use drawing to complete required weaving pattern.


Step 6 – follow through with braid again as per instructions. Hmmmm yeah, nup, not liking this look.


I decided that the 3mm flat soutache braid is too narrow and flimsy looking, not the required look I'm going for so it was off to Jo-Ann's and Hobby Lobby. I settled on some coordinating braid that would probably work and set about to again make the shoulder boards.


I will add the guy was right when he said the easing and tightening of the weave took longer than the actual weaving itself. Eventually I got 4 even looking epaulettes I was happy with.

Next I needed matching military braids. How am I going to make these? Back to google I go, found a link and a YouTube video by Tieing It All Together. You ripper, here we go!

So two goes and I got it! Yee Haa!


Had also ordered bugle cord ends – usually used on bolo ties – and completed the cord end.


Hmmm not too bad.

Oh and I did a bit more research on Tom Mix, he was actually born in Pennsylvannia but did spend a lot of time in Oklahoma?? I know the saloon in Guthrie has a claim to fame with Tom Mix having tendered there and the Tom Mix Museum is in Dewey, so I guess Oklahoma can claim him as one of their own.

Have a good one!

Kat xo


Machine’s Running Hot

Many hours in, the embroidery work is done!

Can't show full patterns of some as they are sort of surprises but there is enough there in the pile to get the gist.

Eight full panels, two Oklahoma armbands and smiley pocket triangles complete!


Here are the finished Oklahoma armbands ready to get to Pony Soldier this weekend.


Having a productive afternoon!

Kat xo


Habit Forming

Riding habit that is!

After Land Run (not included in the previous blog) I set to getting a surprise job done for Annie D Vine. Her 1880-1890's riding habit in a Kelly green Melton Wool. Hawkshaw Fred and I had discussed the making of this for Annie's birthday without her knowledge which made me slightly nervous as we had only briefly discussed colour and thrown a couple of pictures her way.

Got the job done though, a full on week, trim hadn't arrived from Ireland and had to order more soutache which really put the pressure on. Not one to back down from a challenge though, it was game on!

The Victorian riding habit is an interesting skirt suited for ladies to ride side saddle and still be involved in the pleasures of equine sports.

A wider right hand side allows the wearer to sit upon their trusty steed and the skirt would drape nicely over their right knee and the saddle horn without revealing any knees or ankles. Keeping decorum to the max!

Once riding exploits have been had, the lady after alighting from her horse, can hitch up the skirt and fasten it in back on a button. This allows her to walk freely without tripping over the excess skirt.


Riding habits (as mentioned in the Truly Victorian pattern) were 'severe' in look and usually had no trim. I did however, find some old photographs of some with the military style braid work, so this is what we went for to add a little character at least.


The surprise worked! It fitted perfectly! Can't wait to see Miss Annie in her riding habit with all the accoutrements.

Maybe I'll see her doing some riding like this? Or not! From what I've briefly read, it took 2 men to get a lady up on her side saddle and there were many injuries and issues with restraining your horse BUT these are true pictures of women jumping their horses side saddle! Incredible.


Kat xo


Sew On, and Sew On

Lol, I crack myself up when I think of a funny play on words! At least I'm amusing someone I guess.

Sew, I mean, so! What's been happening in the world of Kat and the sewing machine.

Well, I got a $70 you beaut machine when I got back here to take the strain off the embroidery machine and it goes like the clappers! Even had Jack doing some straight stitching for me at one stage.

So before Land Run hit, yes cast your mind back to beginning of April, I did a new set of frillies and petticoat for my friend Belle Vaquera, another smart looking guerilla/Jesse James shirt in vivid red for Gunkiller, a sweet little aqua and silver grey corset for Annie's Shadow, a top for Missouri Mae, throw one in for me and a couple of repair jobs.

Photos?! Yeah someone forgot to get one of Gunkillers shirt! (Rolls eyes in disbelief.)


Then it was finish Jack's sack suit and finish our Tom Mix inspired outfits. Well mostly, I'm still working on the buttons for the Tom Mix jackets and still pondering the epaulet (did I even spell that right? You know the shoulder board thingy's?) and cord. Buttons are car projects though, so all in good time.


THEN Jack gets another outfit. One lucky man at the moment. His 'Thomas Durant' (hee hee I have a thing about voice overs, this time I hear that being said like 'the Swede' says it in the show. Have to have watched it to get it though) I think it is pretty slick and looks the part! Only to find similar hat now and if you have paid attention through Season 4 Ep 1 then he needs a map of Wyoming to simulate the land sale to complete his prop's for a costume contest.


Since then it's been hem cowboy pants, make cowboy pants and seems to be “have you got it in black?” season with everyone wanting black frillies, black skirts and black shirts.


Have had a small injection of colour with the Judge and Justice Lily Kate's gorgeous brocades though and fabulous welt pockets I did make! Happy dance!


NEXT!! Gorgeous blues, deep green's, splashes of gold, off whites, hopefully some silver in my direction, day of the dead, and a bit of gingham to the mix.

Oh and Greasy Creek Slim will be happy to hear that Belle Vaquera and I have finally found fabrics I am happy with for her 'Eva' outfit (another Hell On Wheels inspired ensemble that I have been dieing to make!)

Better get cracking!

Kat xo


Threads from Aus

Unraveling the fabrics, lace and trims, patterns etc from the suitcase's meant jumping into a whole heap of new projects this past few months.

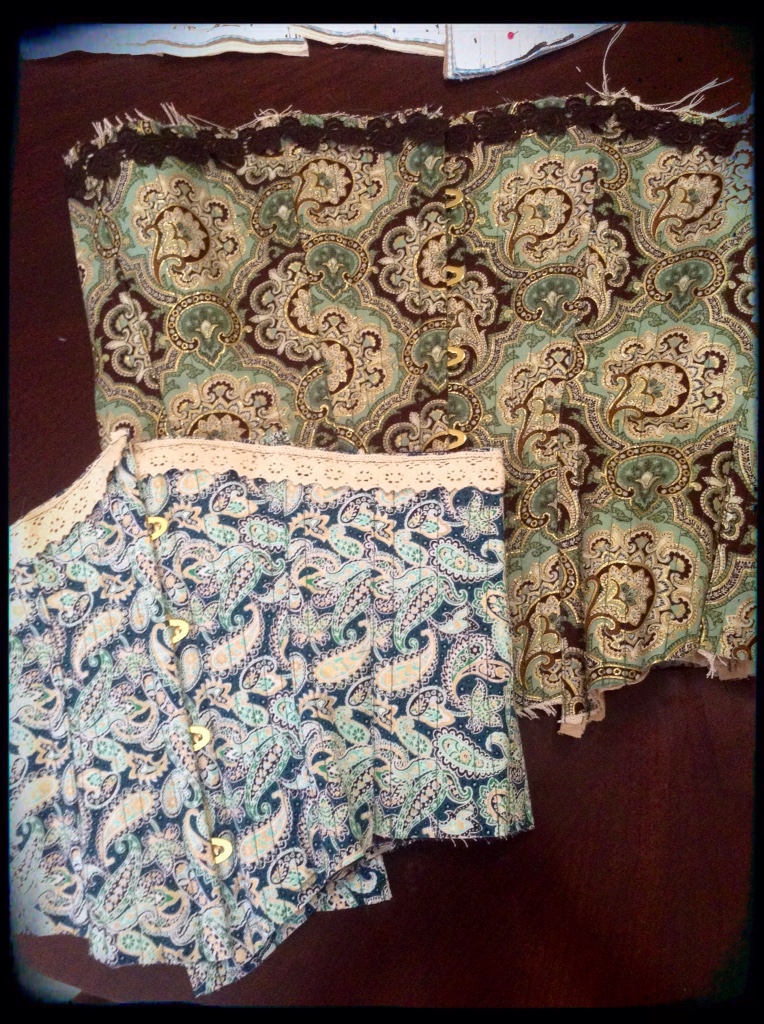
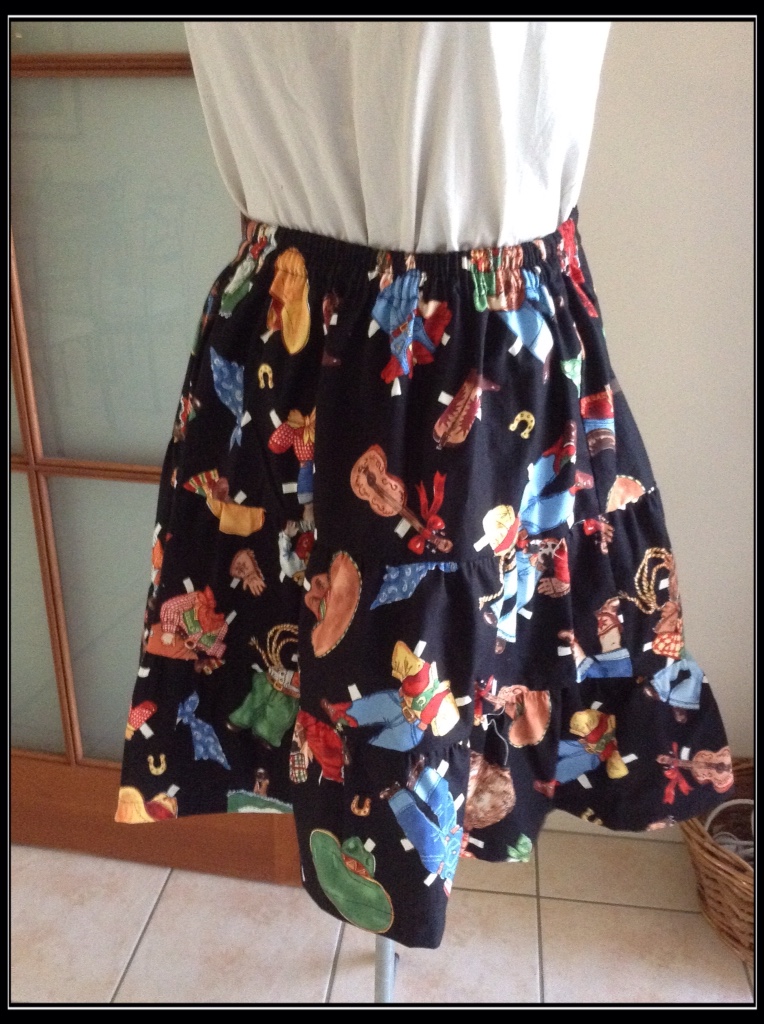
SKIRTS: There were a few basic shooting skirts to try and what a neat one this cowboy skeletons was to do for Belle Vaquera.


Mustang Toni's cute little layered skirt in cowboy paper dolls print kept me amused and her corset – to be done – has been cut out and pattern matched of course!


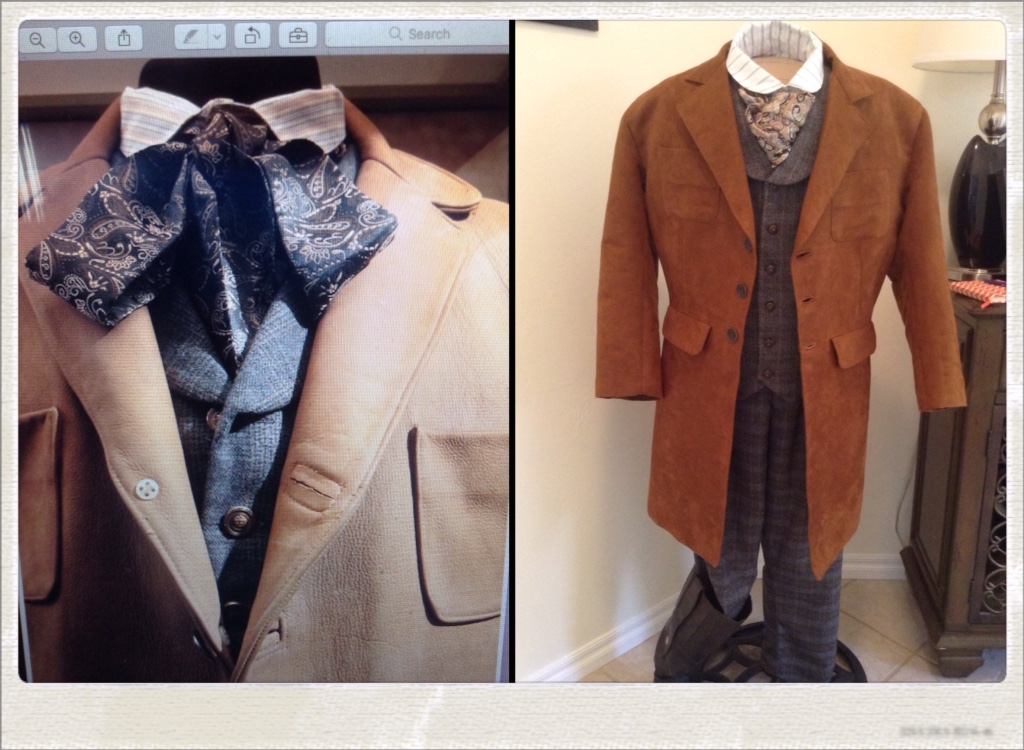
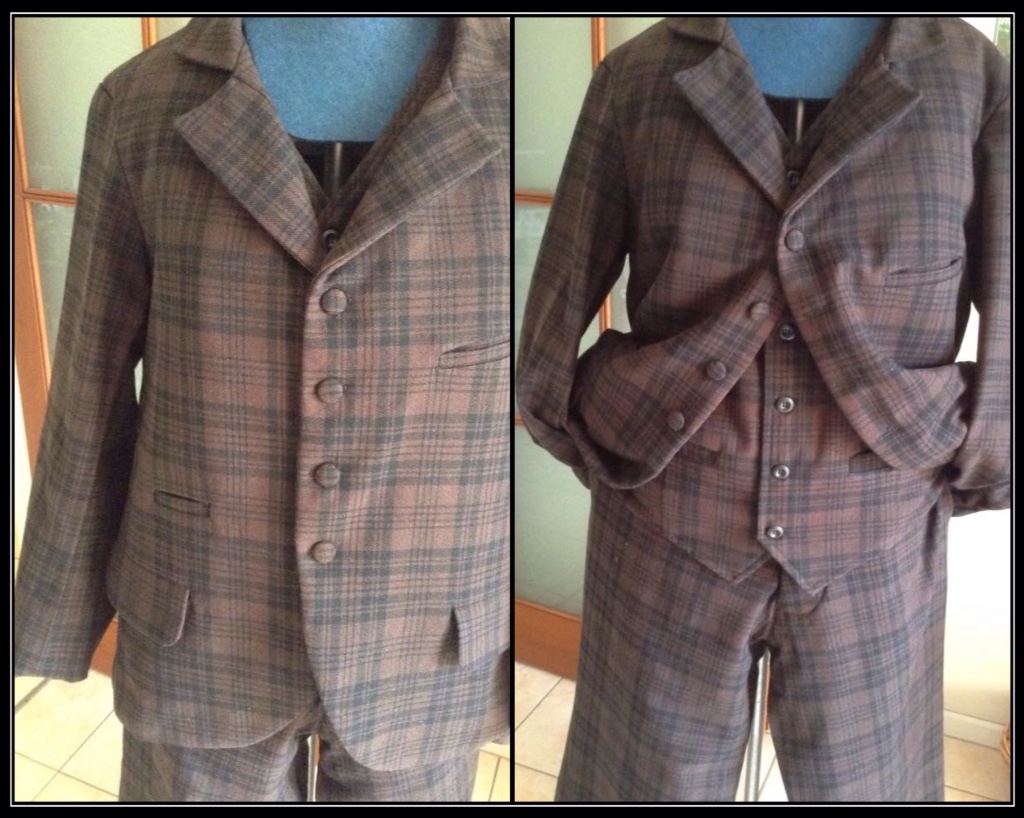
SUITS: Crossdraw Jac got his sack suit which I was over the moon with how it turned out!


This pattern was a 'size the pattern from 32″ chest 28″ waist and little instruction' type of gig. (Jack's getting one, it's 2/3rds done) I managed to work it out upsizing to a 44″ chest and was extremely pleased during the process.

Being a plaid wool, I got pattern to match! I did more research and have made the best welt pockets yet. Called on my costume resource Aspen Filly (thank you so much) and asked about pockets in trousers for the era *sigh, so they both got pockets in their dacks!

More research was done to find out about trouser lining – to the knee or long? Went with the 'to the knee' option.

In the meantime I found a snippet of information regarding the weird little pocket that was shown on the black and white drawing. It sits just above the usual coat flap pocket on the right hand side. Some would jump in and say “is it for your pocket watch?” Well, no, that usually is situated on the inside attached to the vest. It is in fact a pocket for your train ticket. This fascinated me and therefore now had to be included in the construction of the coat.

Of course with my eye for detail, how could I possibly give over this suit without getting a train ticket to go with?! Thanks to Duke Canon I asked if he could print me off a couple of 1890's tickets I'd found and Ta-dah! we now have train tickets!

QUILT: Might as well throw something totally different in the mix with a quilt to head to a friends grandson Thomas.


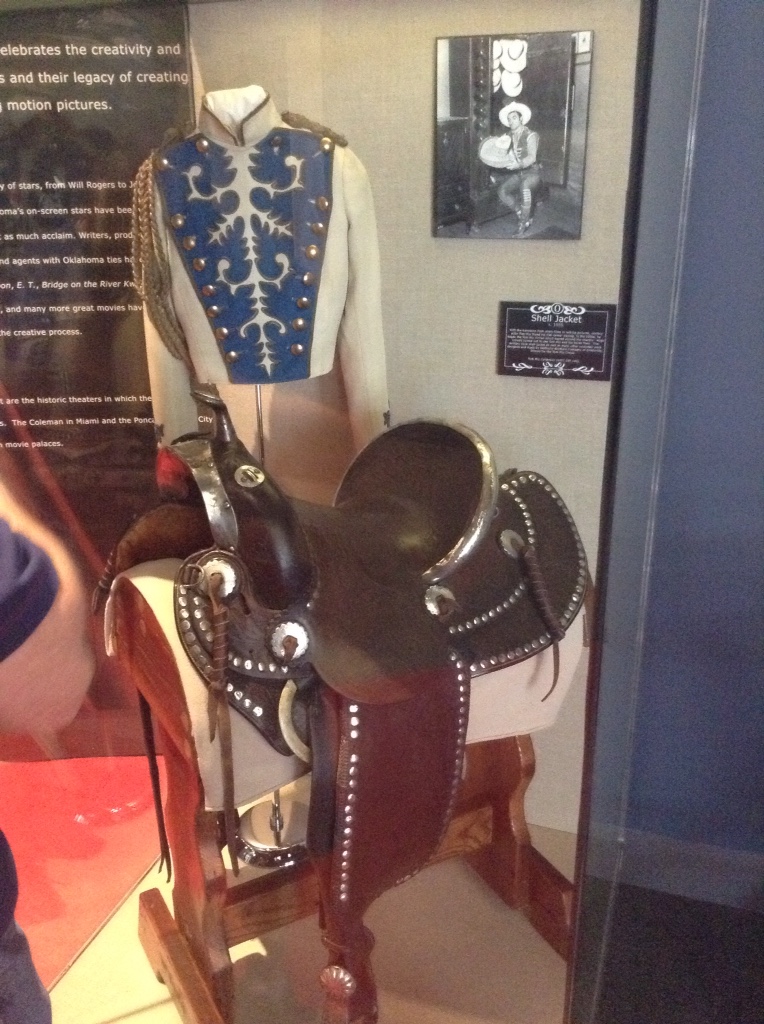
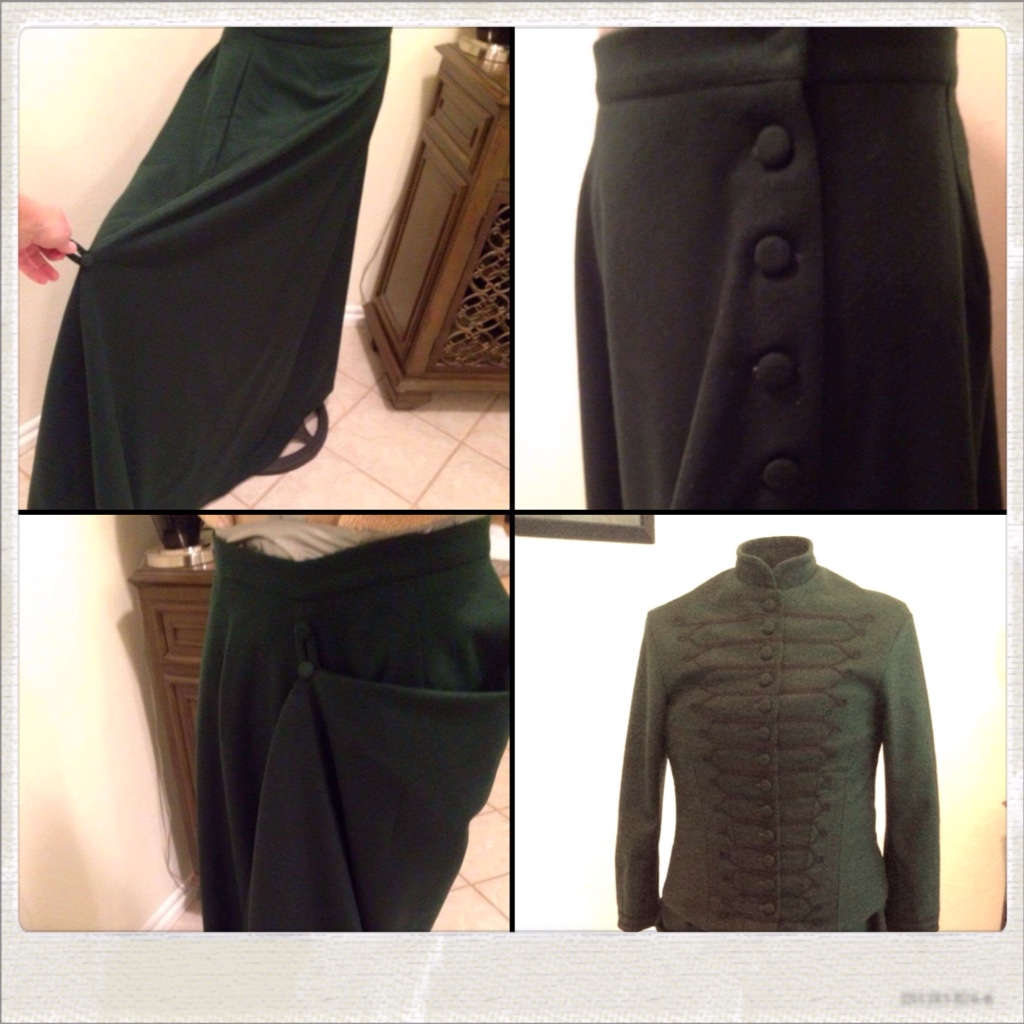
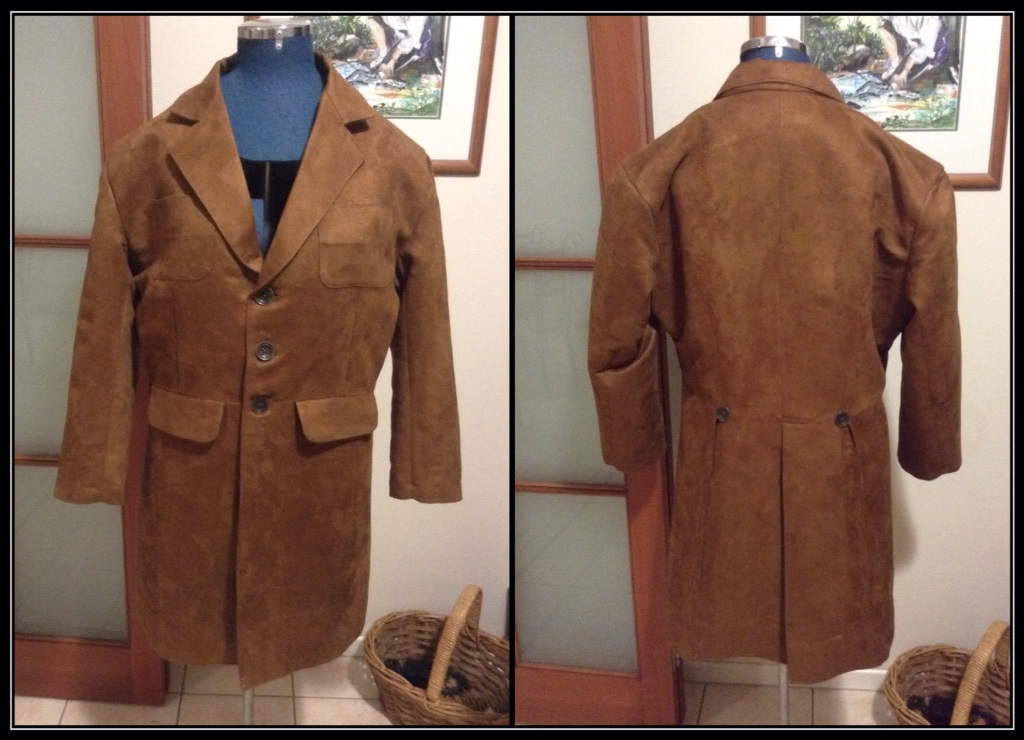
FROCK COAT: Getting back to another 'Thomas', as in Hell On Wheels' Thomas Durant, this coat was asked for by Jack. It was about time he got something new and I'm pleased he is looking at something different, and of a particular character. So that's what he got!

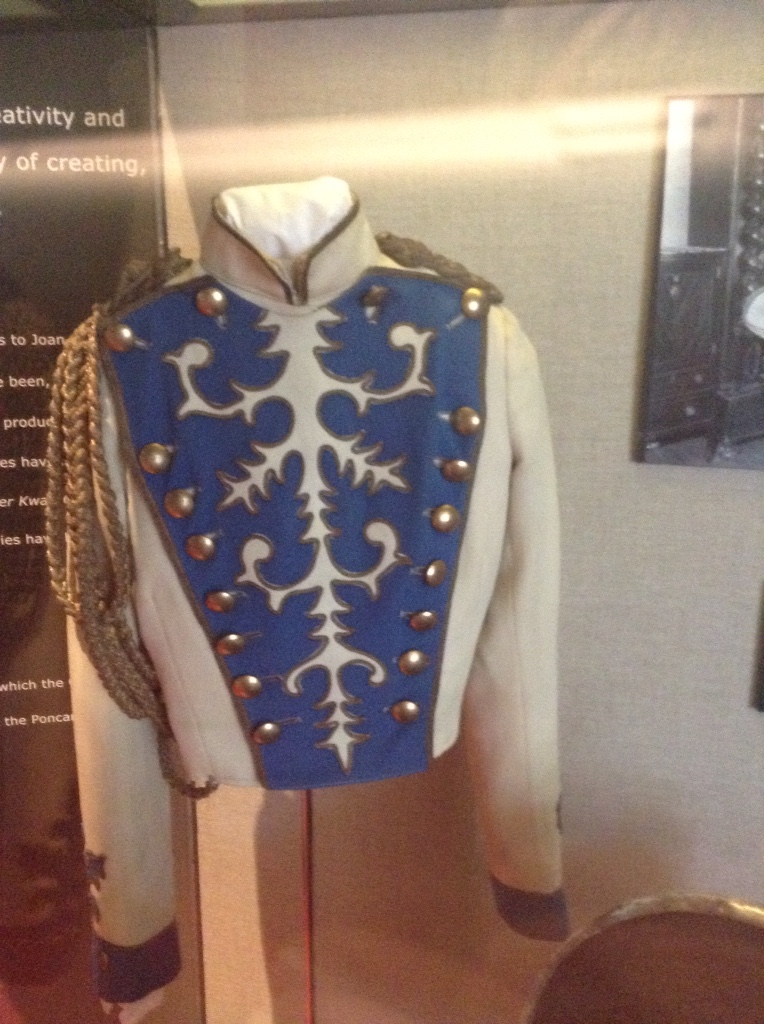
More watching of the series to get it right plus we had seen it in the exhibition at the Cowboy Museum where I had taken many photos. Patch pockets and even welted button holes. Although I'm none too keen to do those again any time soon.


Now he has the shirt to match and I have the vest cut out for him. Pants to go and I already know where he needs to go for the right hat. (I'll be in touch Linda – I know Workin' Ranch have one that is perfect for it!)

What's next?!

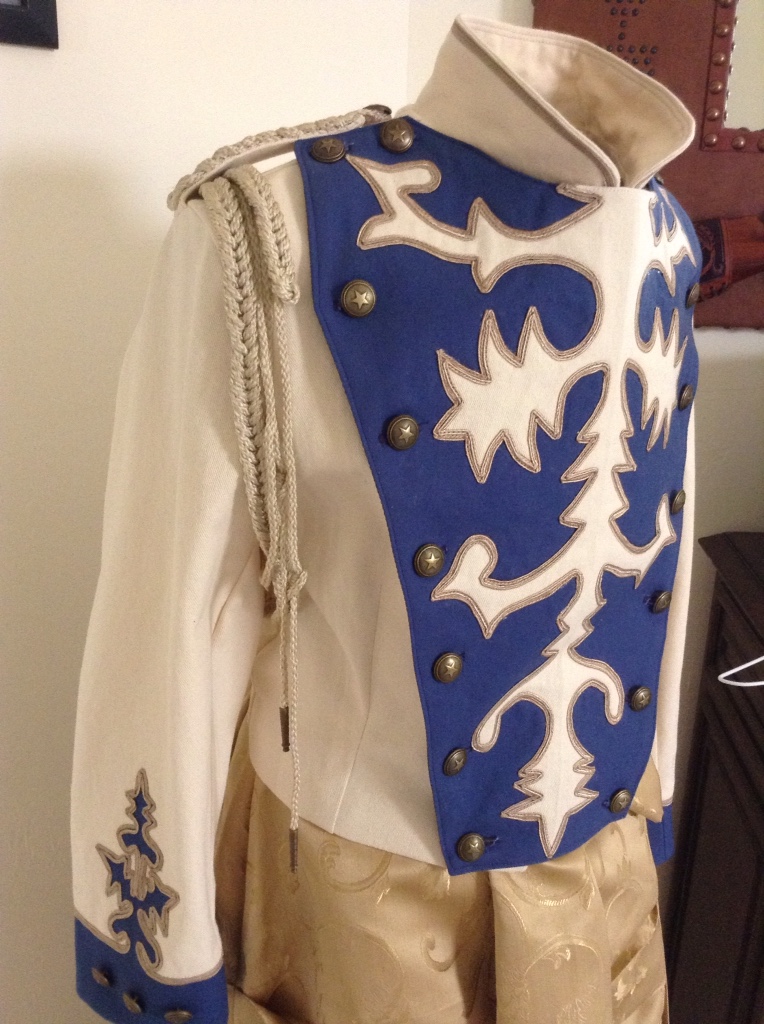
STEAMPUNK: Oh yeah! A fun fabric given to me from Singin' Sue probably 2 years ago now. Coloured cotton reels and thread print was just begging for me to attempt a steampunk styled outfit. It sort of just morphed as I was making it.

From a polonaise pattern as it hung on the mannequin, the front bodice lay open revealing the cheeky red flat lining. Hmmm my mind went into overdrive and I said to my daughter, “I think I shall have lapels and leave it to reveal the corset underneath”. Then I thought, “I don't need sleeves, how's about some cap sleeves?” She still needs some work and accoutrements but here is 'Steampunk Seamstress'.


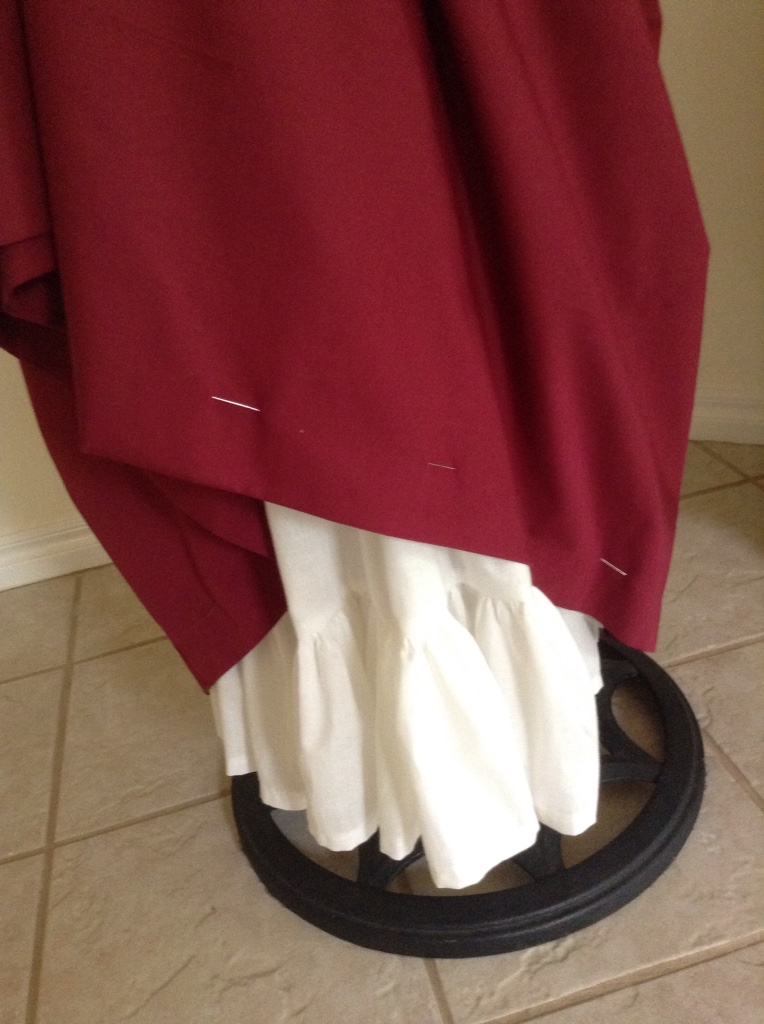
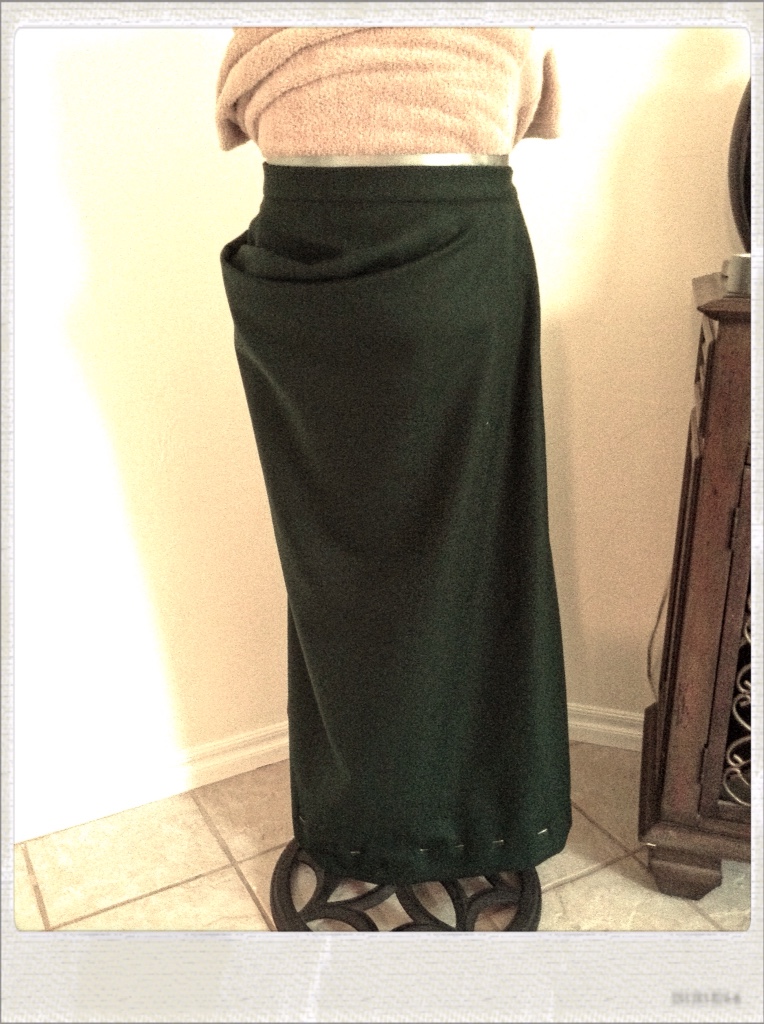
1890's FASHION: Ahhhh the beautiful 1890's gown for Tacky Jackie. Previous feats for finding the perfect colours were achieved. It all started with a trip to a little town called Custer, South Dakota, at the foot of the Black Hills. Jackie came back with a gown she had seen in the Museum there. It just so happened that that Summer, Jack and I were headed for the same territory. One photo was not enough, I needed more and before our time in the Black Hills came to an end I was determined to find the right museum and this gown.

The last day came and we found it – mind you we had driven past it twice in the previous day's. Never mind, got in their on opening and managed to grab some more photos.

Skip forward and now it's time to reproduce this beauty, simple yet elegant in its design.

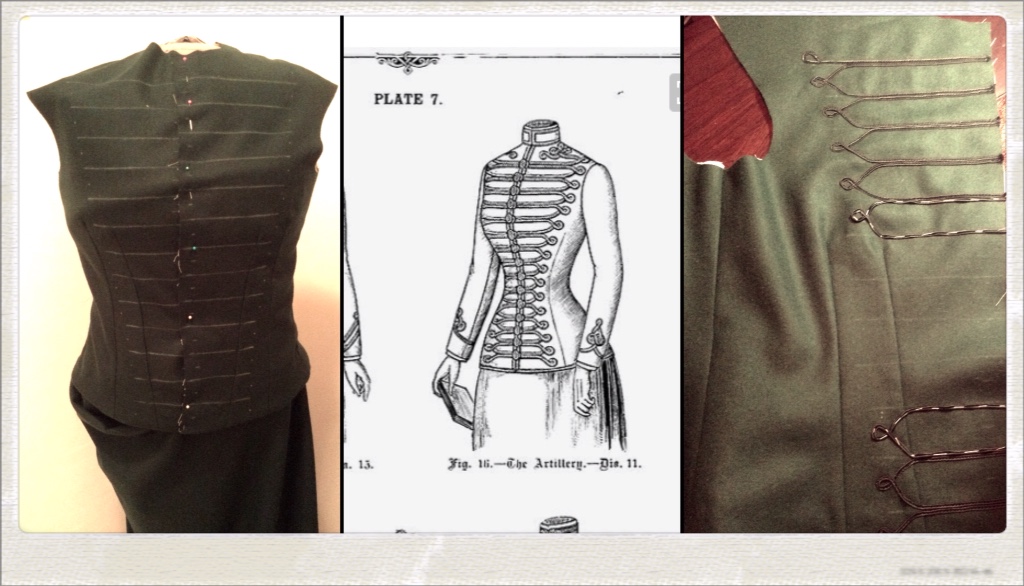
Basic skirt and bodice pattern, make scalloped caps, work out and set in silk – okay, ready for bead work.

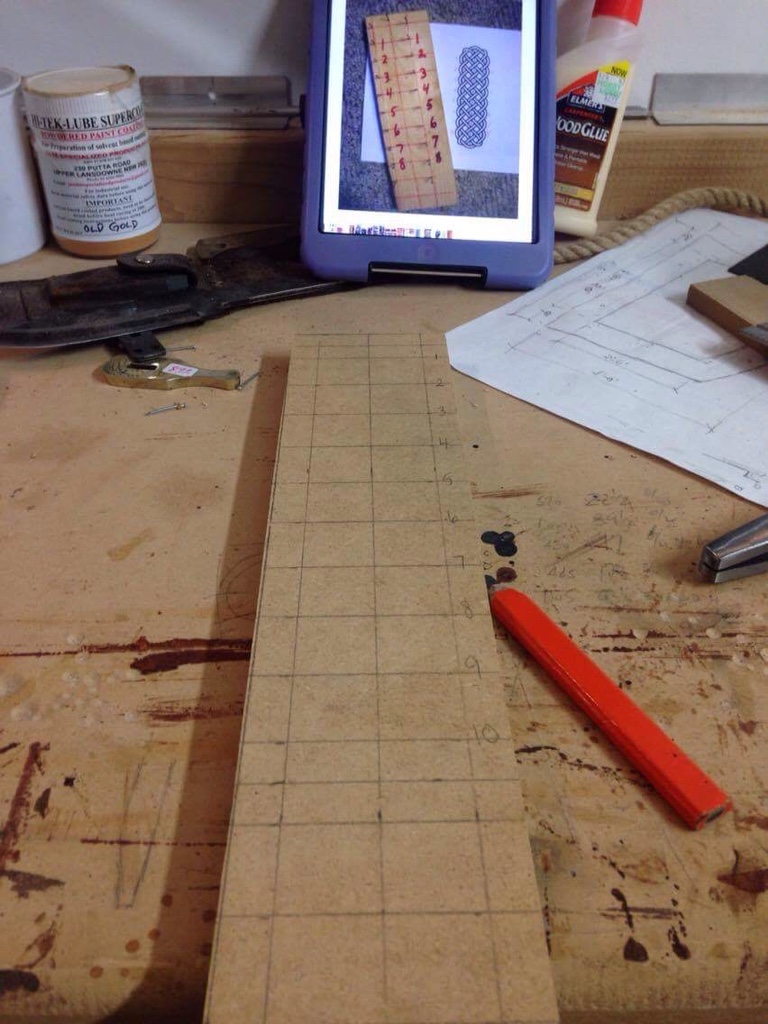
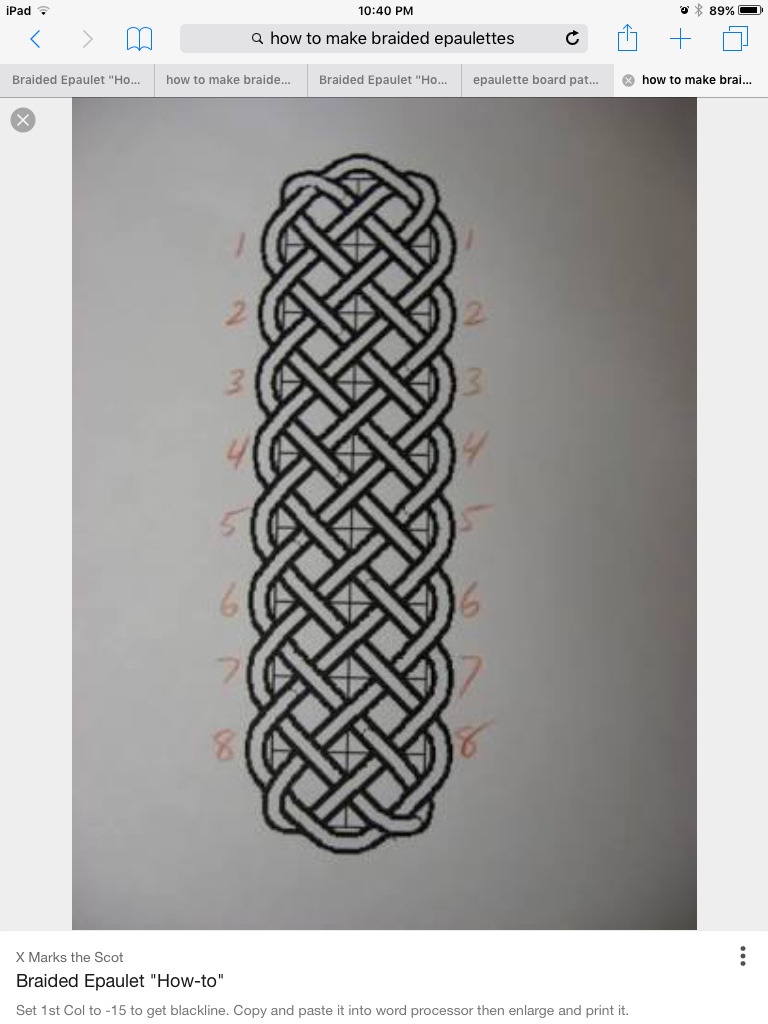
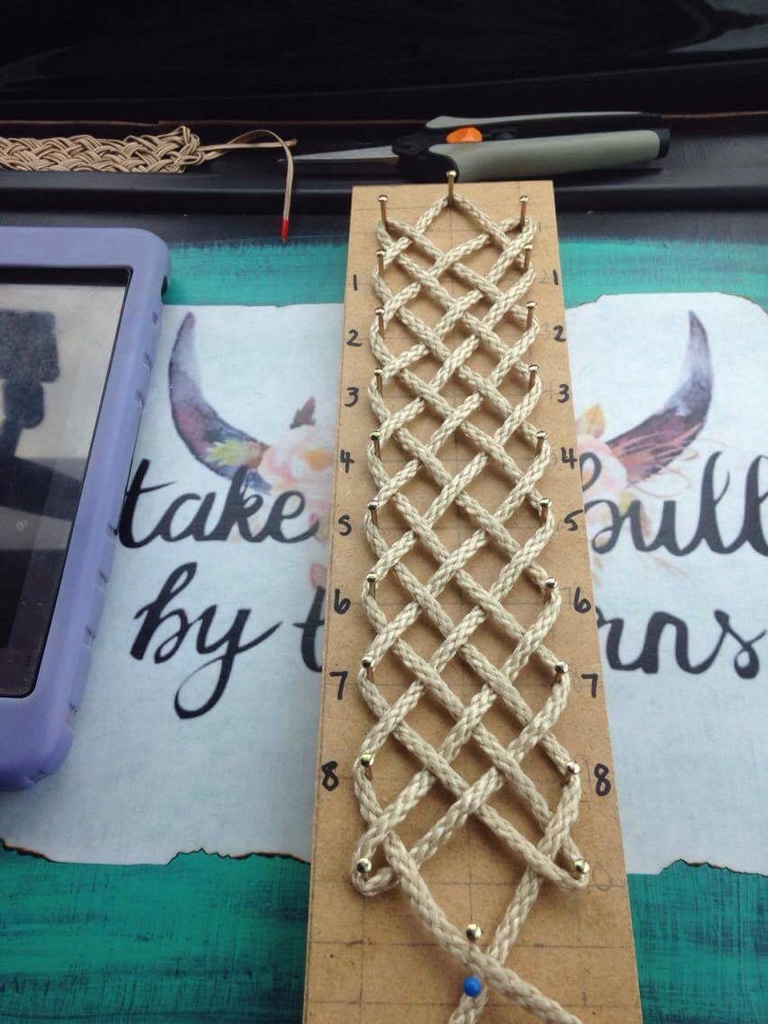
I drew up the bead design according to the pictures, acquired the beads (even though the lady wanted to sell me pre-made trim) and set about to recreate. I had envisaged making the trim before attaching and had Dad make me up a 'rough loom' for how I thought I would do it. After attempting to do that for about half an hour I ditched that idea and went for working the beads straight onto the bodice.

Some 35 and 1/4 hours later, I got it looking like the real deal. If you look really closely there are a couple of differences but as Mum says, “a blind man on a galloping horse wouldn't notice!”


Think I can safely say Tacky Jackie is going to love it.


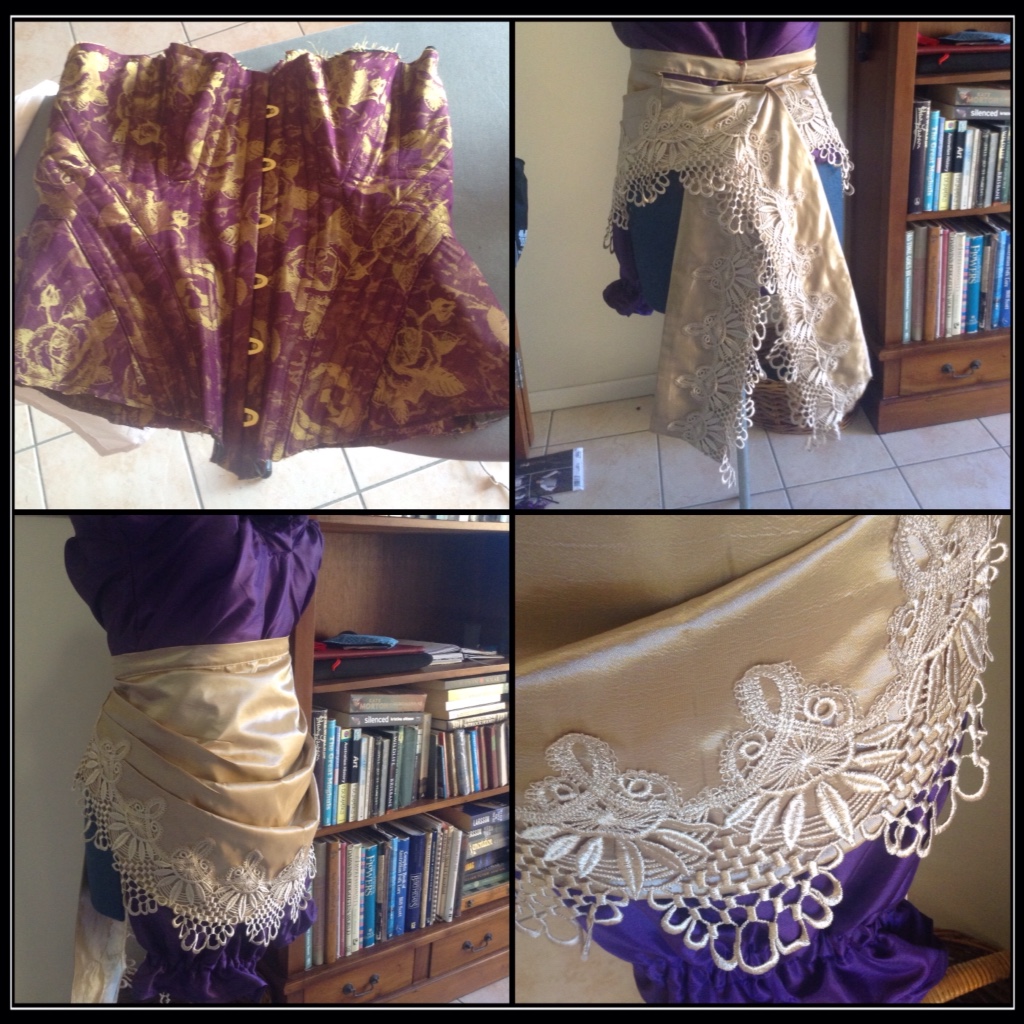
SALOON GIRLS: A quick little purple and gold number for me needs a little more lace that's waiting in OK. Tried out a new corset pattern – gores and me don't exactly fit. We will see how that goes when I get to finish it with steel etc.


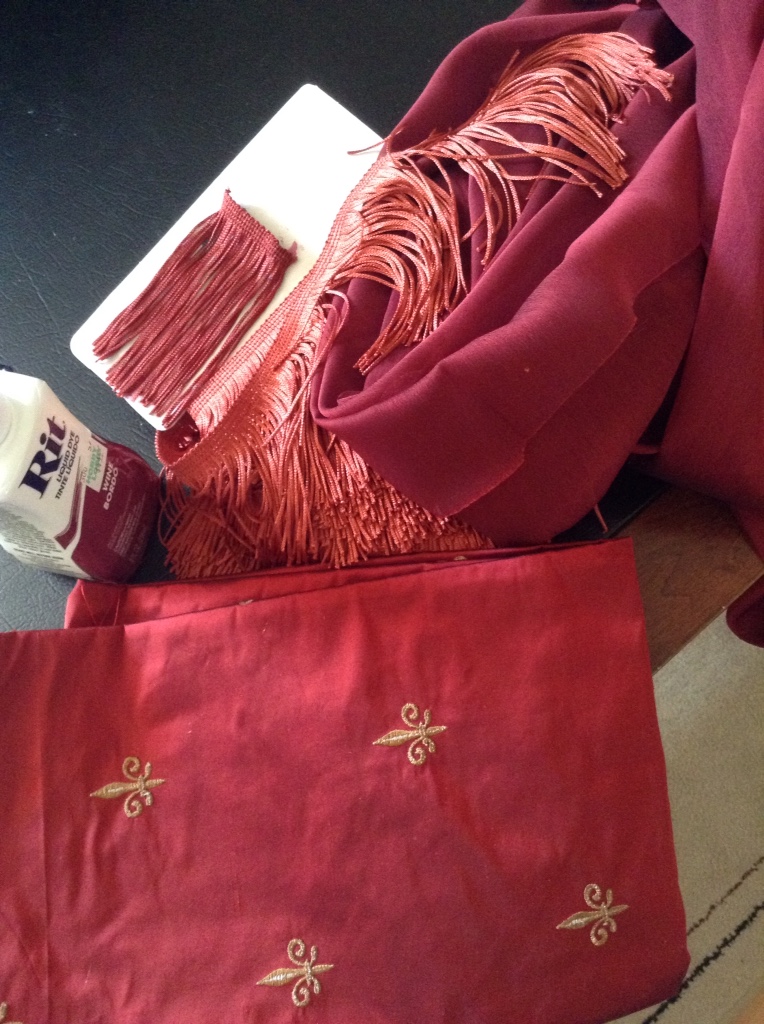
However, the rich red satin and cotton lace number is out of this world!

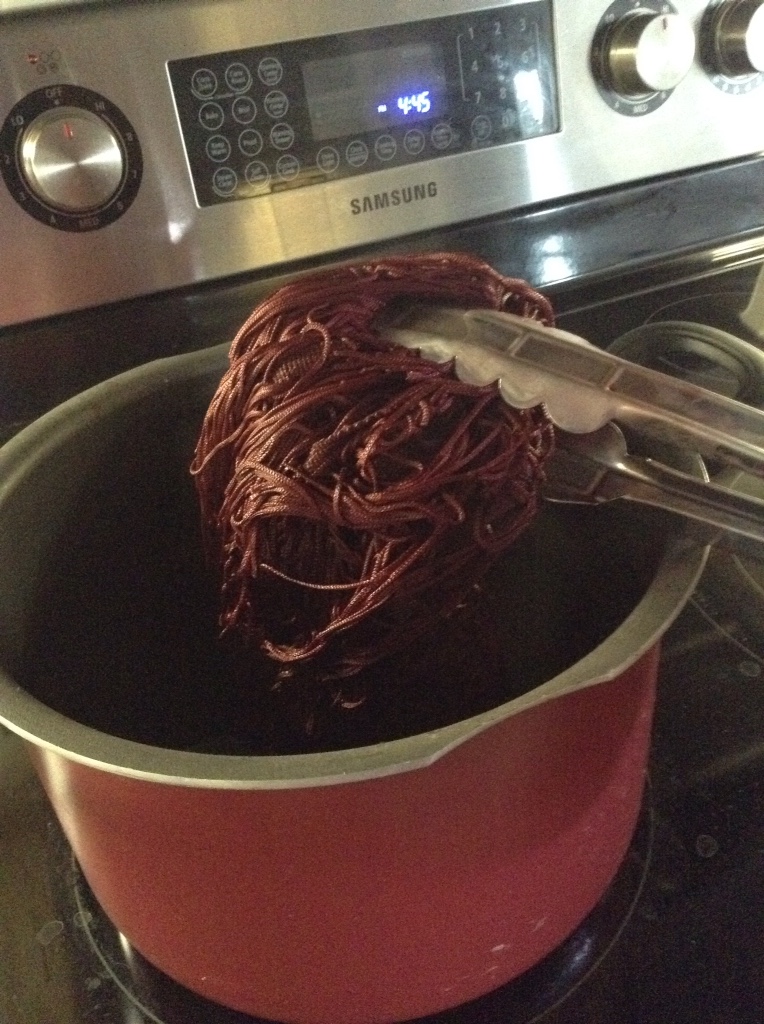
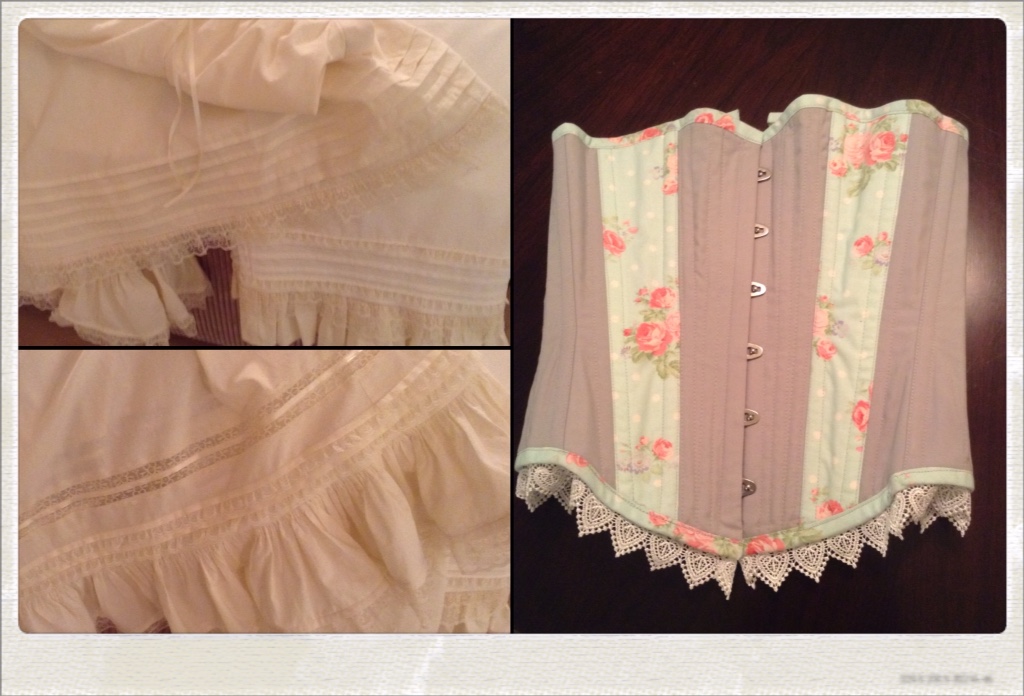
No lace I could find was the right colour or the right feel so I decided that I would embark on a journey into the world of dyeing. Crazy? You bet ya! Others have done it with success, might as well have a crack at it myself.

So with Miss Curstin at my side we tried 4 different methods on some samples, making notes as we went. Thank goodness that child helped me sort through that and we had fun doing it. Another few days and I do the bulk lot, still slightly freaking out as to whether I would achieve the perfect colour. Finally washed out, set and dried I was happy with the result.


Made up the French drawers – divine!


Then it was onto the ultimate corset construction (to date)! Another new pattern to trial AND throw in power mesh that I've never used before. Of course it worked, why I doubted I could do it, I am so excited at the result.

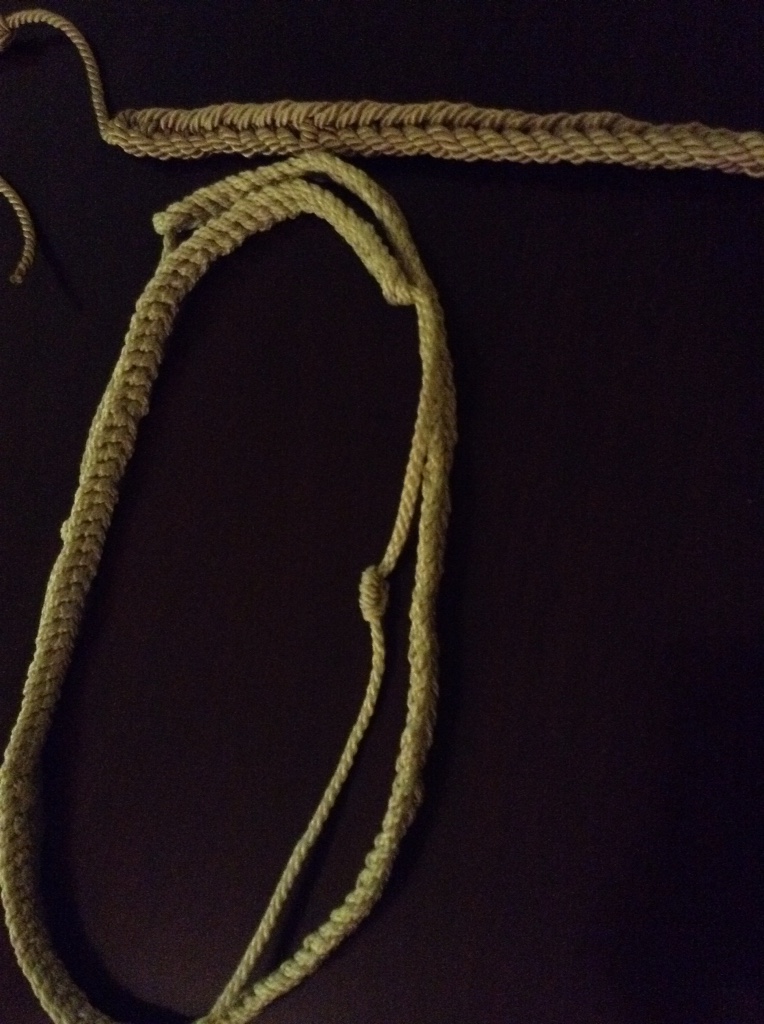
Hand stitching the gorgeous liquorice black scallop trim and appliqués to complete this corset had taken 23hrs. It is totally divine and will be loved by her new owner.
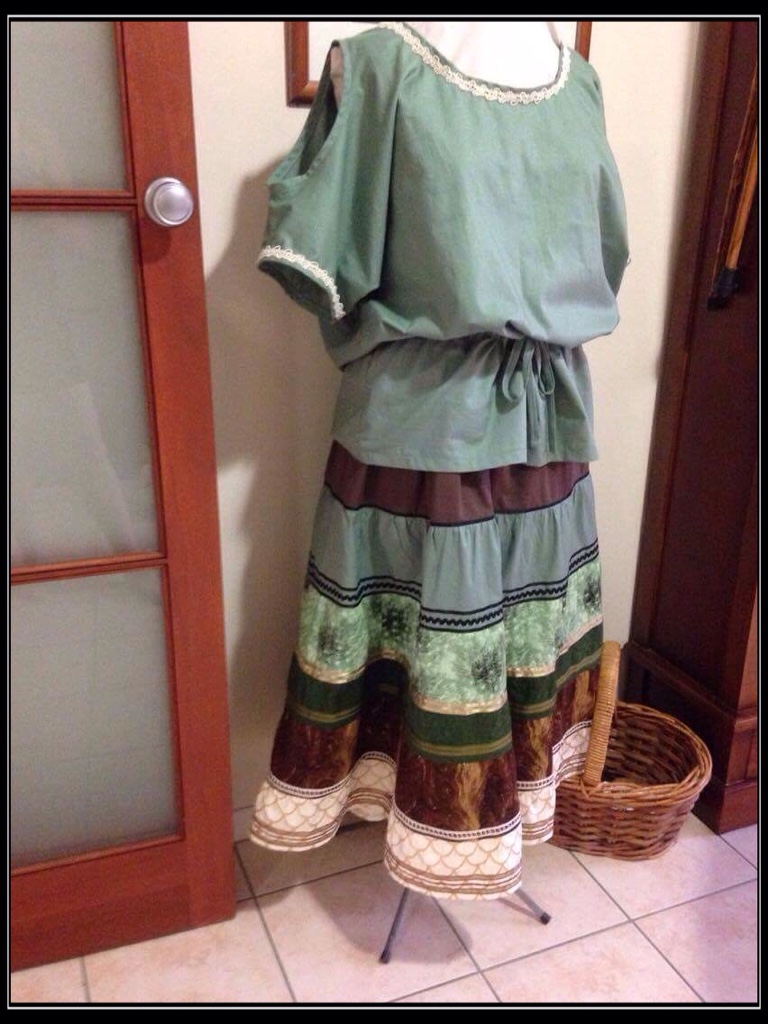
 

Adelita's

Of course the trip wouldn't be finished without a couple more Ad Ita skirts and tops. 'Mint Slice' I called it, for Emerald and a gorgeous turquoise pallet for Trixie.


That's it! Did a few catch ups with OK Carrol and got her started again, Joyce (the mannequin) went back with her and things were getting packed up.

From the sewing desk

Kat xo

P.S. If you didn't get it, this is a catch up, sewing done while in Aus! I'm getting there! I'm getting here. Couple other tops and bloomers thrown in at the last minute just for good measure!!


Liquorice

Delicious! Black beaded appliqués and power mesh are going to make for one stunning black beauty.


Happy dance! The mock turned out perfect and now onto the good stuff.

Every day's a learning curve and keeps my creative mind learning, doing, experimenting and loving the challenges!

Bring it!

Kat xo


Texas-Oklahoma

Playing catch up!

Last weekend was fabulous, spending time with Texas ladies, shopping for fabric in Houston.

After being sworn in to the 'Royal Order of the Safety Pin' we headed out to the first stop – High Fashion Fabrics.


We lunched at Saint Dane's Bar and Grill after, then headed on to some more stores!


Got most of what was on the list! Win!

We spent two great days shooting with the Thunder River Renegades with some Mexican food and drinks thrown in for good measure.


Don't you just love TJD's new pinup shirt?!


Sunday afternoon it was back on the road to Oklahoma.

It's been head down, bum up this week and today we had the Territorial Marshals club match. Yippee! shot good today and so did Jack, we finished 5th and 7th respectively out of 55 shooters.

It's on again tomorrow instead of Wild Bunch, as we head for Sand Springs next week and the Oklahoma State Championships.

Cheers

Kat xo