Diary of Desire Part 8

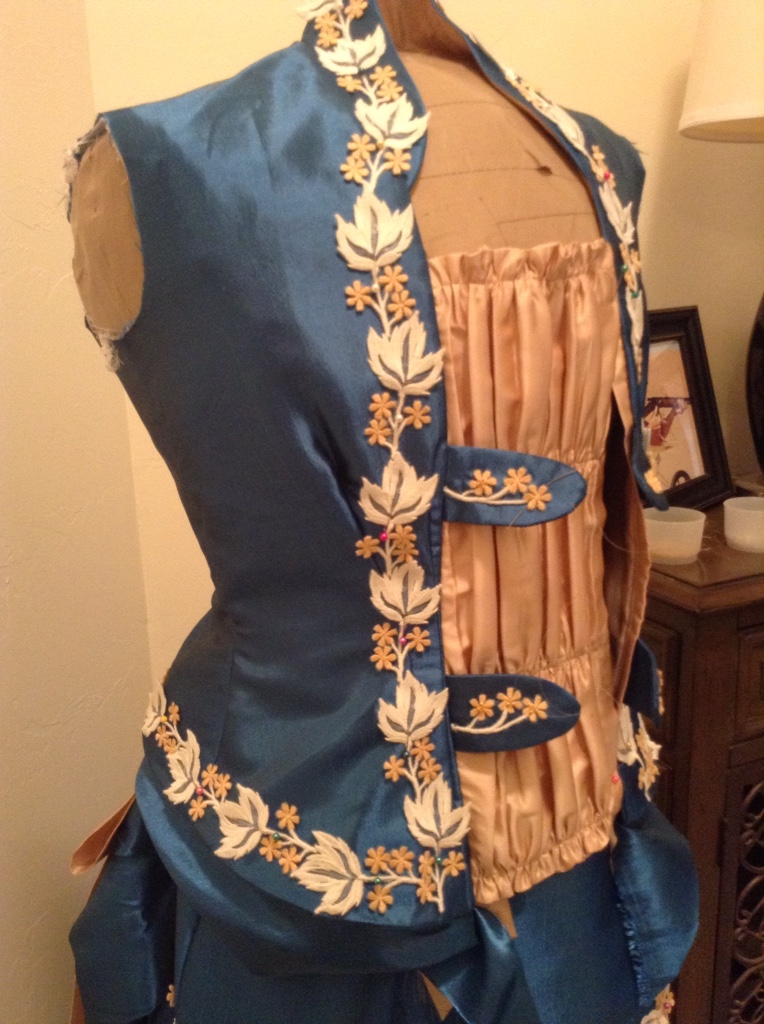
After many hours of trimming, beading (1,216 to be precise) and hand stitching embroidery I finally finished 'the' gown, culminating in the most exquisite piece I have yet produced.

For one very happy client, Texas Flower is in love with her gown to which I am extremely pleased.

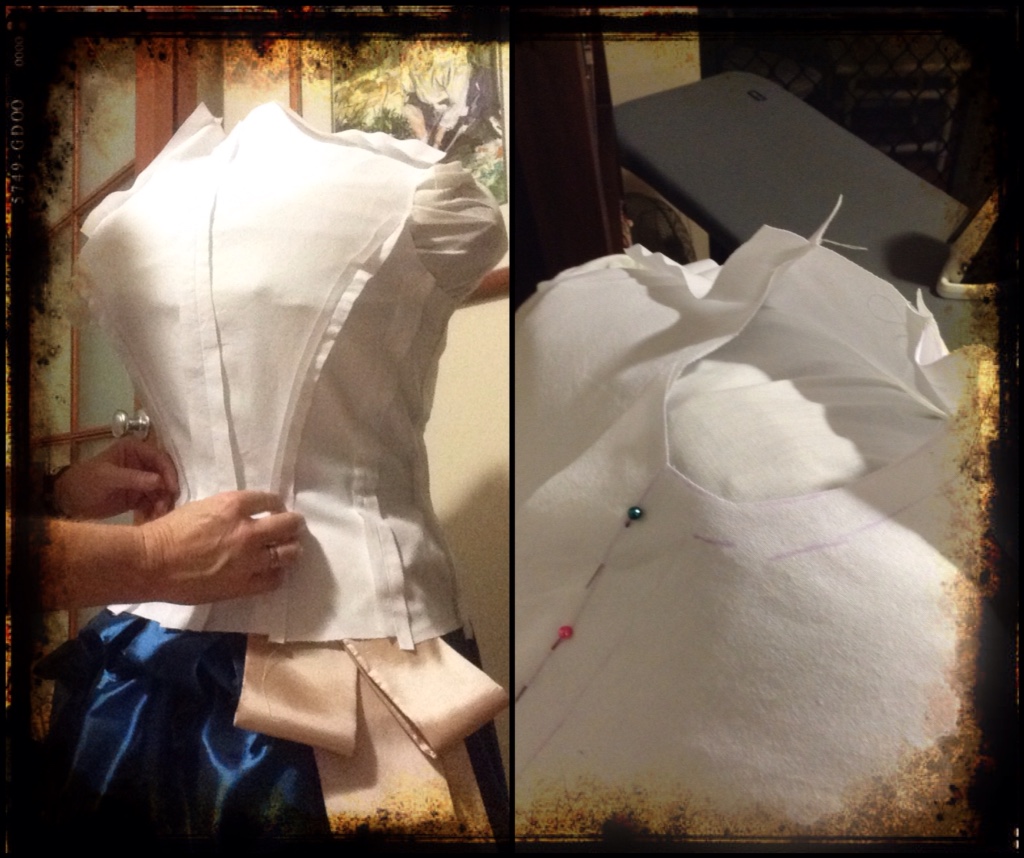
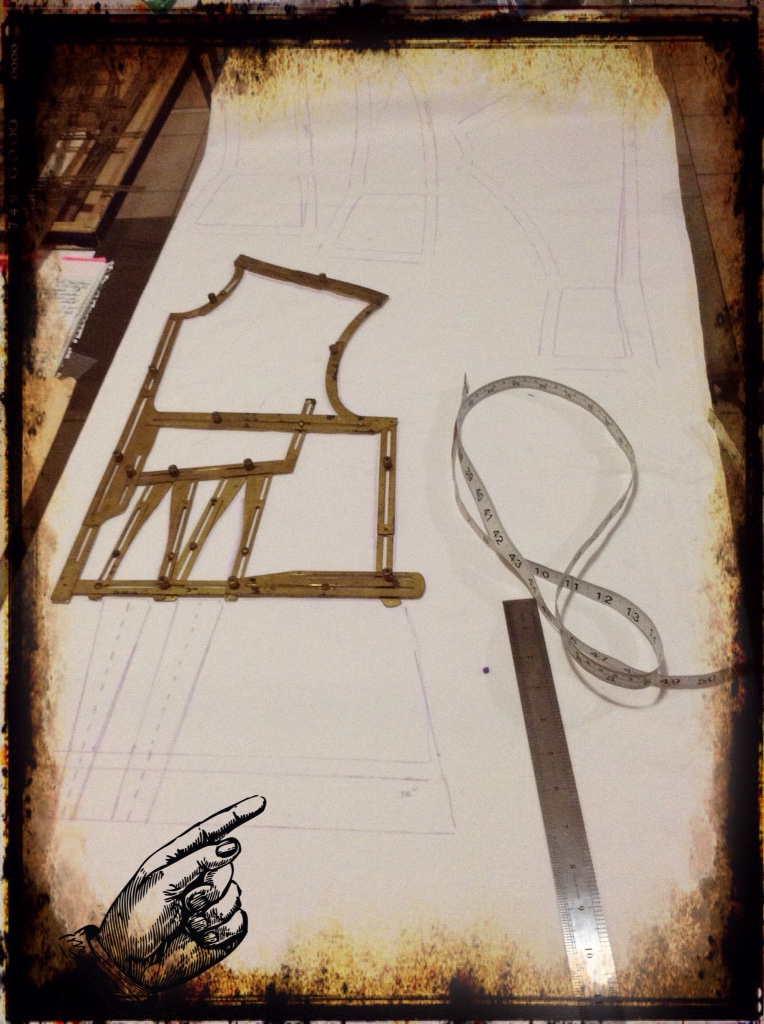
The McDowell Drafting Machine and its book of instructions were indeed true. It states that, if correct measure is taken then a gown should be produced and ready to ship to your client without inconveniencing the wearer with numerous fittings.

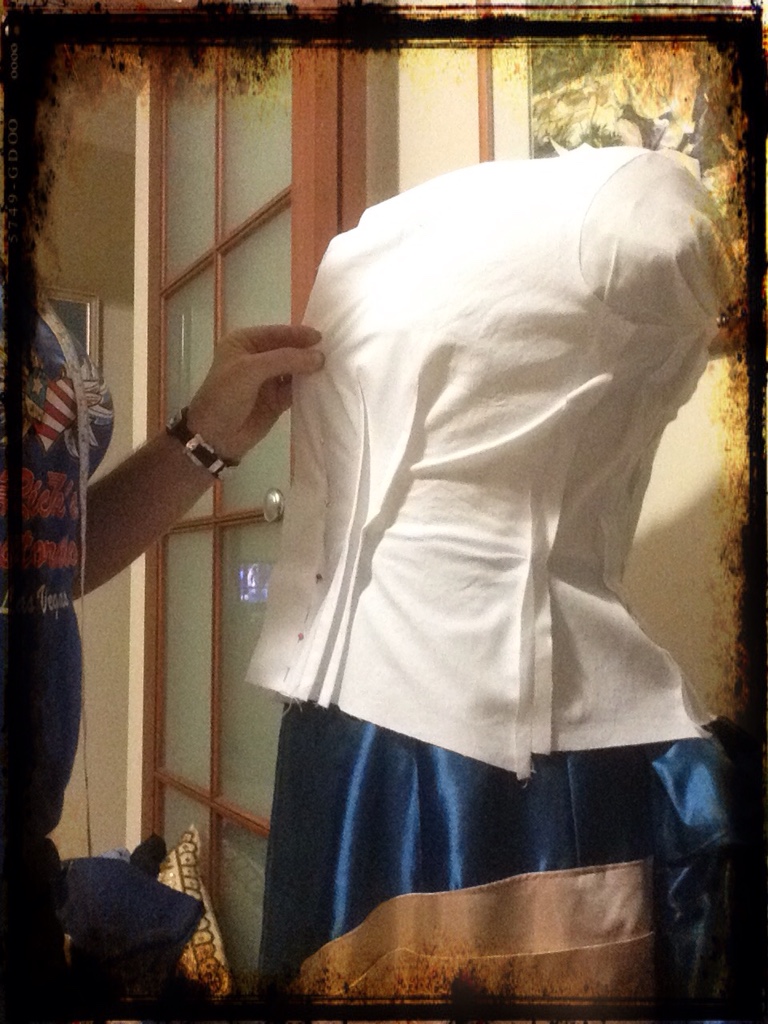
Despite my misgivings, I now believe every written word in that book! Having made the gown in Australia and finishing it here, Flower had not once tried the gown on until we met in Moriarty last Tuesday. It fit perfectly!

I had a minor conniption when I realised I had not bought any boning with me to add stays to the bodice but am happy to say it did not require it.

This makes it even more like the original really where it was noted (in an article by Peaches O'Day and Miss Tabitha, SASS Chronicle 2012) unusually, did not have any.

Finally, on Friday evening all hand stitching was done and I could hand the gown over to one very excited and happy lady.

The 'Diary of Desire' was worn to the banquet Saturday night and to all our delight Texas Flower was EOT 2016, 1st Place, Best Dressed Lady.

Under the evening lights of the Belle Union Saloon those little Czech glass beadlettes shone bright like stars and the smile on Texas Flower's face!


True satisfaction from a yesteryear seamstress.

Kat xo


She’s ‘Armless

Well she won't be for long I guess we are at Diary of Desire Part 6?

I'm cutting it fine but something take careful thinking and consideration. Some might call it procrastination ……in the quest of getting it right.

This morning I've completed all the hand cutting out of the embroidery and now a day of hand stitching and beading!

Just look at her! She's beautiful. The gold thread changed colour when I washed the soluble backing from it (note to self – ask Mum why) but it is delicate and going to look sensational once beaded.


20 hours just in embroidery and trimming to this point.

Soon she will be ready to hand over for her first reception.

Happy cowgirl seamstress

Kat xo

P.S. I haven't forgotten the sleeves, just want to do the triple/quadruple check again.


Diary of Desire Pt 5 – Putting It All Together

Yes, it appears the 'inner 15 year old child' managed to work it out as per the books instructions. Although one instruction wasn't adhered to and had to correct the error of my ways, thankfully still at the lining stage.

Everything seems to be sitting just perfectly except for one slight alteration needed at the back neck and shoulders. Got to be happy with that!


Here in lies the mishap! See how the front seems high?


Well, refer back to said instructions and previous shown photo of drafting and as I was told to – “add 7″ to the front skirt following dart allowances etc”. As you can see I felt in my, somewhat older than 15 years, that this seemed a little ridiculous (despite having drawn it up as instructed) when the rest of the bodice was only 5″ from waist to edge and so cut it off 2″shorter. The result? A bodice that's too high in the front and doesn't look right.


Right, stitch that bit back on and thankfully almost nothing of the join is to be seen once sides are trimmed to suit and once facings are in place all is concealed. Shhhhh!

Then it was onto the sleeves. Now in one mind I was tempted to use a Truly Victorian sleeve pattern but I had decided this gown was to be done using the drafting machine and this would surely be cheating. The book specifically details how to draft sleeves from measurements using the square rule.

So yes! I did draft the sleeve using the detailed square. Much to my surprise and sheer delight it worked! All I really needed to see was that it looked like I knew it should be!! Bit hard to see in the pink pen.


Next step was to pull apart the lining and cut each piece from the fashion fabric and reconstruct. With this now comes the customising – making it look like the photograph of the original gown.


You will note now the front is a sensible length? Lol! Sides to be trimmed.

Next step. Let's have a look back at the original bodice. Oh yes, tabs across front gold ruched section. Hooks and eyes all down one side for the bodice to be closed, so a small gold panel is put in place.


So far so good me thinks!


Take one gold ruched panel 12″ down to 41/4″ stitched in 4 places. Pin to inside right. Excited much!

Collar appeared to be slightly curved and lined in gold so that's what we now have.


Facings have been stitched in ready for hand finishing and that my friends is where it has been left.

Sleeves to be completed back in Oklahoma and embroidered lace to be created.


Cheers

Kat xo

P.S. Internet back on and back in Oklahoma. 🙂


Just Breathe….

Ahhhhhhh, jobs are done, diary and book closed for the weekend and will open up on the other side of the world as we continue our adventures.

Looking forward to more workspace and my sample board for friendly reminders of colour choices and work ahead.


Looking forward to more challenges, fabric hunting, satisfying clients and enjoying the variety that is.

Kat xo